Digital transformation ke is daur mein, online education ka scope bohot tezi se badha hai. Aaj YouTube, specialized applications, aur hybrid model ke zariye desh ke har kone tak education pahunch rahi hai. Agar aap ek teacher, coach, ya content creator hain, toh ek professional aur high-quality video content deliver karna aapki sabse badi zaroorat ban chuka hai.
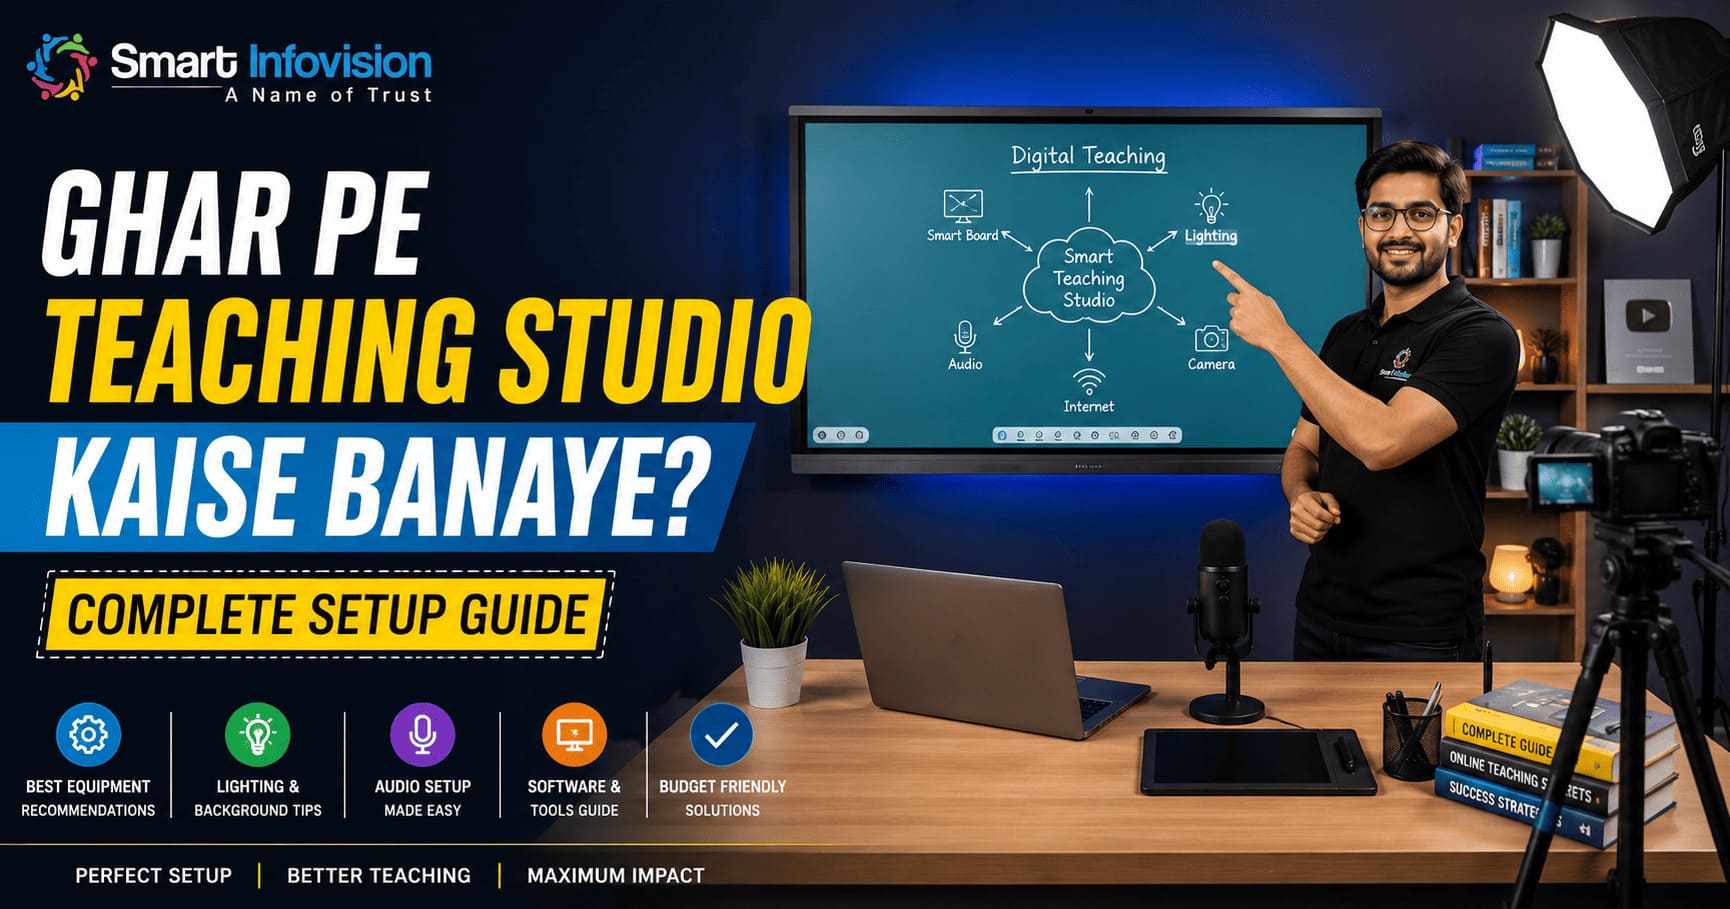
Lekin sabse bada sawaal jo har educator ke mann mein aata hai, woh hai: Ghar pe teaching studio kaise banaye?
Ek aisi jagah jahan bina kisi external disturbance ke premium audio aur crystal-clear video quality ke saath lectures record ya live stream kiye ja sakein. Is detailed guide mein hum aapko ghar par ek professional smart studio setup karne ka complete structural blueprint batane ja rahe hain.
1. Room Selection aur Space Planning
Studio banane ke liye aapko kisi bohot bade commercial space ki zaroorat nahi hai. Aap apne ghar ka koi bhi shaant kamra select kar sakte hain. Ideal room size kam se kam 10 x 12 feet ya usse bada hona chahiye taaki aapke digital hardware aur lighting panels ke beech ek perfect distance maintain kiya ja sake.
Room choose karte waqt in baaton ka dhyan zaroor rakhein:
- Zero Noise Interference: Kamra aisi jagah ho jahan road traffic ya ghar ke baki hisson ki aawaz sabse kam aati ho.
- Ventilation & AC Provision: Studio lights aur technical servers thodi heat generate karte hain, isliye kamre mein ek silent split AC ka hona bohot zaroor hai. Windows ko completely block karna hoga taaki bahar ki natural light video ke exposure ko disturb na kare.
2. Interactive Flat Panel (Digital Board) — Aapke Studio Ka Dil
Purane zamane ke whiteboards ya basic projectors par padhane ka daur ab ja chuka hai. Aajkal ke modern learning ecosystem mein ek premium smart interactive panel sabse badi requirement hai.
Jab aap ek reliable brand select karte hain, toh Smart Infovision Interactive Flat Panel aapko ek seamless writing experience provide karta hai.
[Traditional Whiteboard] ──(Disadvantage: Low Visibility & High Maintenance)──> Outdated
[Interactive Flat Panel] ──(Advantage: 4K UHD, Zero Writing Delay, Android/Windows)──> Modern Standard
Digital Board Choose Karte Waqt In Specifications Ka Dhyan Rakhein:
- Size Selection: Agar aapka room chota hai toh 65-inch ka panel thik rahega, lekin professional coaching aur natural movement ke liye 75-inch ya 86-inch ka display sabse best mana jata hai.
- Display Quality: Panel hamesha 4K Ultra HD resolution aur anti-glare toughened glass ke saath aana chahiye taaki camera ki lights ka reflection screen par na pade.
- Dual OS Integration: Aapka board Android aur Windows (via OPS server) dono ko support karna chahiye taaki aap smoothly PDFs, PPTs, 3D simulations, aur YouTube educational videos ko ek sath link karke padha sakein.
3. Video Capture Solutions: Professional 4K PTZ Camera
Aapka teaching method kitna bhi accha ho, agar video quality dull ya blurry hogi, toh students ka engagement drop ho jayega. Webcams ya basic DSLRs long teaching sessions ke liye reliable nahi hote hain kyuki unme overheating ka issue hota hai.
Online teaching ke liye sabse advance solution hai ek remote-controlled Smart Infovision 4K PTZ Camera.
PTZ (Pan-Tilt-Zoom) cameras ko aap ek jagah fix kar sakte hain aur remote ke zariye unka angle adjust kar sakte hain.
Camera Sensor (4K UHD) ──> Autofocus & Lighting Calibration ──> Smooth Live Streaming (OBS/YouTube)
High-end setups mein auto-tracking PTZ cameras ka use kiya jata hai, jo teacher ke movement ko automatically follow karte hain. Isse agar aap padhate waqt screen ke ek kone se dusre kone tak chalte hain, toh camera aapko perfect focus mein rakhta hai.
4. Audio Architecture: Crystal Clear Microphones
Online teaching mein video se bhi zyada important audio quality hoti hai. Agar student ko aapki aawaz saaf sunai nahi degi, toh woh complex concepts ko samajh nahi payenge. Studio setup ke liye aapko do tarah ke professional mics par focus karna chahiye:
- Collar / Lapel Wireless Microphone: Yeh microphones un teachers ke liye best hain jo padhate waqt bohot zyada move karte hain. Sennheiser ya Benchmark series ke wireless collar mics kaafi crisp audio response dete hain.
- Podcasting / Condenser Microphone: Agar aap ek jagah baith kar tablet ya pentab ke zariye face-cam videos banate hain, toh ek cardioid polar pattern wala studio microphone aapki voice ke base ko perfect filter karta hai.
5. Lighting Setup: Anti-Flicker Studio Lights
Ghar ke normal LED bulbs ya tubes video recording ke waqt screen par light spots banate hain aur video mein flickering (line chalna) paida karte hain. Professional recording ke liye aapko ek structured multi-point lighting arrangement design karna hoga.
Aapko apne room ke layout ke hissaab se in elements ko deploy karna chahiye:
| Light Component | Placement Position | Functional Benefit |
| Main Key Light | Front-Left or Front-Right (45° Angle) | Teacher ke face par clean brightness aur clear illumination lane ke liye. |
| Fill Light | Opposite side of Key Light | Face ke shadows aur dark spots ko completely neutralize karne ke liye. |
| Ceiling Anti-Flicker Lights | Directly above the Digital Board | Interactive panel ke upar koi shadow nahi banne deti aur even light distribute karti hai. |
6. Software aur Technical Infrastructure
Pure hardware components ko smoothly run karne ke liye aapko ek acche configuration wale Computer or Laptop (i5 or i7 Processor, Minimum 16GB RAM, Dedicated Graphics Card) ki zaroorat hogi. Yeh system aapke camera inputs ko process karega aur live streaming software ko run karega.
Aapko in essential tools aur platforms ko configure karna hoga:
- OBS Studio (Open Broadcaster Software): Yeh ek free aur sabse powerful open-source software hai jiske zariye aap apne digital board aur camera views ko overlap karke customized layout bana sakte hain.
- Acoustic Treatment: Kamre ke andar aawaz ko goonjne (echo) se rokne ke liye deewaron par acoustic foam panels ya heavy curtains lagana zaroori hai. Isse aapki aawaz bilkul flat aur professional record hoti hai.
Conclusion: Comprehensive Studio Setup Blueprint
Ghar par ek professional online class environment create karne ke liye sahi technical components ka right integration hona bohot zaroori hai. Sahi equipment choose karne se lekar complete end-to-end management tak, ek end-to-end turnkey solution providers jaise ki Smart Infovision Studio Setup Services aapke process ko bohot asaan bana dete hain.
Sahi infrastructure mein kiya gaya ek chota sa investment aapke content ki value ko professional standard par le jata hai, jisse aap digital education ke is expansive market mein khud ko ek authority ke roop mein establish kar sakte hain.
For a complete practical visualization of real-world physical dimensions, layout execution, hardware mounting, and structural positioning of multi-point lights inside a working hybrid home environment, you can evaluate the detailed walkthrough provided in this video regarding the Complete Studio Setup for Online Teaching, which covers real-time installations, space management metrics, and live component testing.