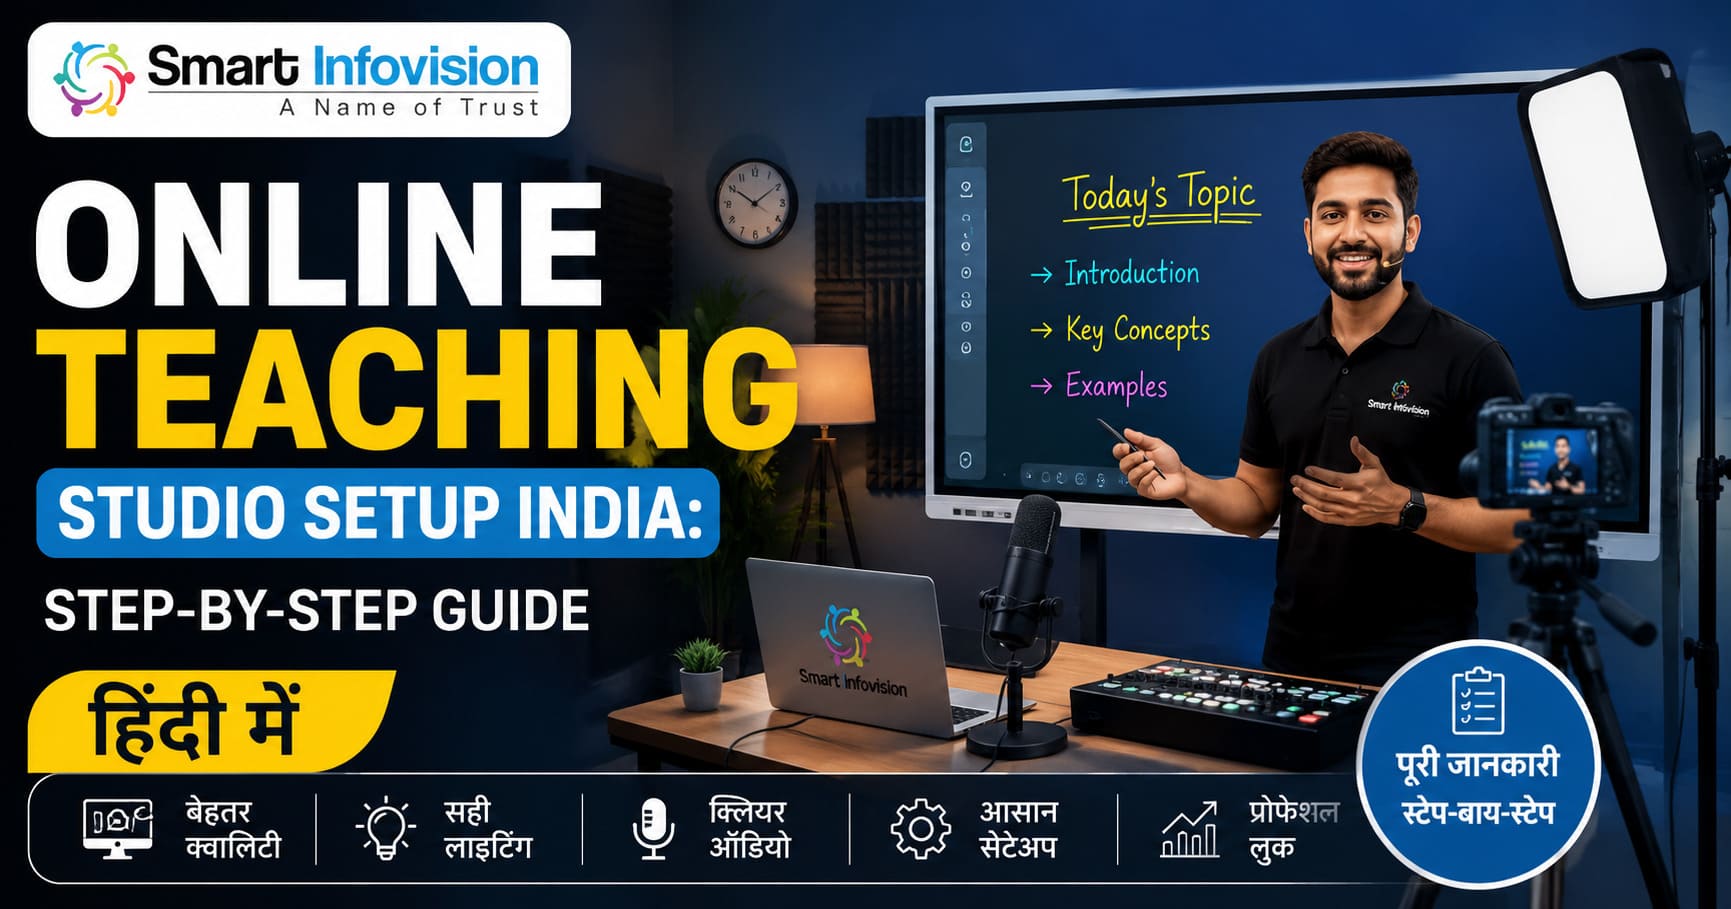
Digital education ke is daur me online padhana ab koi option nahi, balki ek jaroorat ban chuka hai. Agar aap ek teacher, coaching institute owner, ya YouTuber hain aur India me apna ek professional Online Teaching Studio Setup India taiyar karna chahte hain, toh aap bilkul sahi jagah par hain.
Ek behtareen studio setup se na sirf aapki video aur audio quality premium hoti hai, balki aapke students ka learning engagement bhi 10X tak badh jata hai. Is comprehensive guide me hum step-by-step jaanenge ki aapko kaun-kaun se equipments ki jaroorat hogi, unka approximate budget kya hoga, aur aap kaise ek professional setup ready kar sakte hain.
Online Teaching Studio Setup Ke 5 Main Pillars
Kisi bhi professional educational studio ko set karne ke liye 5 cheezein sabse zyada mahatvapurna hoti hain. Inhe hum studio ke main pillars kehte hain:
[Digital Smart Board] ──> [4K PTZ Camera] ──> [Wireless Microphone] ──> [Anti-Flicker Lighting] ──> [Acoustic Soundproofing]
In sabhi components ko step-by-step samajhte hain taaki aap apne budget ke mutabik sahi choice kar sakein.
Step 1: Smart Board (Interactive Flat Panel) — Studio Ka Dil
Online teaching studio ka sabse bada aur mahatvapurna hissa hota hai Interactive Flat Panel (IFP) yaani Smart Board. Chalkboard ya simple whiteboard ka zamana ab ja chuka hai. Aaj ke advance classrooms me smart boards par PPTs, 3D diagrams, aur internet se live content chalakar padhaya jata hai.
Market me kai bade brands hain jaise Benchmark Technomate, Maxhub, aur BenQ. Agar aap India me premium quality aur reliable after-sales service dekh rahe hain, toh aap Smart Infovision Interactive Flat Panels ke option ko explore kar sakte hain, jo alag-alag sizes aur budgets me custom solutions provide karte hain.
Sahi Size Ka Selection Kaise Karein?
- 65 Inch: Agar aapka room size chhota hai (approx 10×10 feet) aur aapka budget limited hai.
- 75 Inch (Most Popular): Yeh size online teaching ke liye sabse ideal mana jata hai. Isme camera frame perfect banta hai aur likhne ke liye kaafi space milta hai.
- 86 Inch: Agar aapka offline classroom bada hai aur aap wahan se hi live class chalana chahte hain (Hybrid model).
Step 2: Camera Selection — Clear Visuals Ke Liye
Aapka board jitna bhi achha ho, agar aapka camera sahi nahi hai toh output bekar ho jayega. Online teaching ke liye do tarah ke cameras sabse zyada chalte hain:
1. 4K PTZ (Pan-Tilt-Zoom) Camera
Yeh cameras high-end studios me lagaye jaate hain. Inhe aap remote se control kar sakte hain, zoom-in aur zoom-out kar sakte hain, aur yeh continuous moving target (teacher) ko bina blur kiye track kar sakte hain.
2. Full HD Webcam / Camcorder
Agar aapka budget kam hai, toh aap ek premium quality ke webcam se shuruwat kar sakte hain. Halanki, long-term aur professional live streaming ke liye PTZ camera hi best investment hota hai.
Step 3: Audio Solution (Microphone) — Sabse Zaruri Element
Ek baat hamesha yaad rakhein: Students kharab video quality jhel sakte hain, par kharab audio quality nahi. Agar aapki awaz me echo hai ya background noise aa raha hai, toh students 5 minute me hi class chhod denge.
Professional recording ke liye aapko inme se ek choose karna chahiye:
- Wireless Collar Microphone: Yeh teachers ke liye best hota hai kyunki padhate waqt aapko board ke samne chalna-phirna padta hai. Sahi wireless mic aapko wire ke jhanjhat se azaadi deta hai.
- Podcasting / Condenser Microphone: Agar aap ek hi jagah baith kar tablet ya digital pad par padhate hain, toh condenser mic aapke liye behtareen voice crispness dega.
Aap apne studio setup ke liye complete equipment guidance aur audio-video configuration ke live solutions Smart Infovision Studio Setup Categories par dekh sakte hain, jahan microphones se lekar custom hardware tak sab available hai.
Step 4: Studio Lighting — Shadow-Free Frame Kaise Banayein?
Smart board par padhate waqt sabse badi problem aati hai Screen Reflection aur teacher ke face par aane wali Shadows. Isko solve karne ke liye lighting setup ka sahi hona zaroori hai.
- Anti-Flicker LED Lights: Studio me hamesha anti-flicker LED panel lights ka use karein. Normal ghar ki lights camera frame me flickering (line aana) paida karti hain.
- 45-Degree Angle Placement: Lights ko hamesha teacher ke left aur right side me 45-degree ke angle par lagayein taaki board par direct reflection na pade aur face par natural glow aaye.
- Softboxes / Diffusers: Direct tej roshni se bachne ke liye LED panels par softbox ya diffuser ka use karein.
Step 5: Soundproofing Aur System Configuration
Studio banate waqt room ka eco (awaz ka goonjna) kam karna zaroori hai. Iske liye aap niche diye gaye tareeqon ka use kar sakte hain:
- Acoustic Foam Panels: Room ki deewaron par acoustic foams lagayein jo sound waves ko absorb kar leti hain.
- Heavy Curtains & Carpets: Agar foam ka budget nahi hai, toh room me mote parde lagayein aur floor par carpet bicha dein. Isse echo kaafi hadd tak kam ho jata hai.
Computer/Laptop Requirements:
Live streaming aur heavy video editing ke liye aapko kam se kam Intel i5 (11th Gen or higher) ya AMD Ryzen 5 processor, 16GB RAM, aur ek achhe Dedicated Graphics Card wale system ki jaroorat hogi.
Budget Plan: Kitna Kharch Aayega? (2026 Price Estimates)
India me ek full-fledged online teaching studio setup ka cost aapke components ke selection par depend karta hai. Chaliye ek rough budget overview dekhte hain:
| Equipment Type | Specification | Approximate Price (INR) |
| Smart Board (75″) | 4K Android/Windows Hybrid | ₹1,40,000 – ₹2,20,000 |
| Camera | 4K PTZ Camera with Remote | ₹25,000 – ₹50,000 |
| Microphone | Wireless Collar / Lapel Mic | ₹8,000 – ₹18,000 |
| Lighting Setup | 2-3 Anti-Flicker LED Panels | ₹10,000 – ₹20,000 |
| Acoustics & System | Basic Foam + High-End PC | ₹50,000 – ₹80,000 |
Pro-Tip: Agar aap alag-alag equipment lekar khud assemble nahi karna chahte, toh aap complete, pre-configured pre-packs ka use kar sakte hain. Beginner aur advanced options ke liye aapSmart Infovision Online Shop Collectionpar jaakar direct packages check kar sakte hain, jo pure India me delivery aur installation provide karte hain.
Conclusion
Ek baar sahi Online Teaching Studio Setup India taiyar ho jaane ke baad aapka content creation process bohot smooth ho jata hai. Aap bina kisi technical rukawat ke live classes le sakte hain, high-quality course content record kar sakte hain, aur YouTube par professional educational videos upload kar sakte hain.
Shuruwat me agar budget tight hai, toh aap ek achhe Smart Board aur basic mic-camera se start karein, aur dheere-dheere apne studio ko upgrade karte chalein. Sahi direction me kiya gaya yeh investment aapke teaching career ko ek nayi oonchai par le jayega.
Studio setup ke alag-alag budget models ko live dekhne aur pure hardware setup ko physically samajhne ke liye aap is Interactive Display Showroom Tour ko dekh sakte hain, jahan Smart Infovision ke experts ne alag-alag price ranges ke smart boards aur studio packs ka honest comparison aur performance walkthrough share kiya hai.